
P&T CV Process
Congratulations on being selected for the P&T process this year! Since we are in the midst of building a new system for you - Portfolio - this year is going to be a little different. You will import your activities into Portfolio and generate a Curriculum Vitae - P&T using that system. (Detailed instructions on how to generate a document within Portfolio can be found on the Portfolio help page). Then, you will link your CV - P&T to your Promotion & Tenure account. Below, we will review the document creation process and show you the steps you’ll need to take in order to successfully attach your CV for P&T review.
Building a CV in Portfolio
This section will go over how to generate a CV - P&T from Portfolio. Be sure you’ve added all desired activities to your Activities section. For detailed instructions on how to do so, please see Portfolio’s Help page.
Log into your Portfolio account and navigate to your Profile page. You will see this bar across the top of the page:

Note that to start off with, you are in Full View.
Include in Options
You have the ability to individually select which activity entries and applicable expertise entries will appear on your CV - P&T.
Scroll down your Profile and you will see all your activities listed. Next to each activity entry and expertise entry, you have an Include in column. Any Include in options that you’ve selected during the activity entry process will appear here. If none have been selected yet, you will see a blank space.

For an entry to be included on your CV - P&T, that document option must be listed as an Include in option next to the entry.
Scroll down and determine which activities you would like to include on your document.
To drop an Include in option, click on its white ‘x.’
To add an Include in option, click anywhere in the rectangle to see the list of options. Click on the desired option and it will populate.
Generating a Document
When you are finished adjusting your Include in options, scroll back to the top of your Profile page.
Just below the document option bar, you will see Start date and End date fields.
Start Date/ End Date fields are used to display activities on the generated document within a certain time period. A blank date range will automatically pull all non-archived activities and Profile information. Confirm what date parameters, if any, you need for the P&T process.
Select those date parameters and choose a document option. For this example, we are using CV - P&T. Click the appropriate button and the page will reload.

You may now generate your document by clicking the Create button.
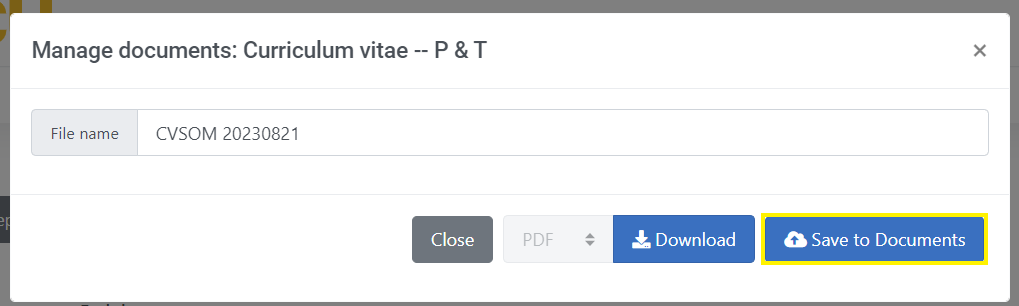
You will be greeted with the following options. If you’d like to view your document, you can click the Download button. But in order to upload your CV - P&T to your Promotion & Tenure account, you will need to Save to Documents. This will bring the PDF into Portfolio’s Document section (view this section using the left-side navigation bar). You are free to rename the file as you wish before saving.
If you selected your document of choice and then added date parameters, click the Refresh button.
If you’d like to add other activities to your CV - P&T that have not been selected with the Include in option, you must first reset the View As to Full View, edit the included entries, and then select your desired document once again.
Linking to your Promotion & Tenure Account
This section will detail how to link your recently created CV - P&T from your Portfolio account to your Promotion & Tenure account.
Begin by logging into your Promotion & Tenure account. 
Once in, select the Documents section.

The following page you see should look similar to this one, but with your identifying information listed:

Find and click the button that says Import CV from Portfolio.
A pop-up will appear listing the Curriculum Vitae - P&T files that have been saved to your Portfolio Documents section. Choose which document you would like to attach, and click Import.

You will then see your CV - P&T listed on your screen as an attached file.

Pro Tip: You can only upload one CV - P&T to your P&T account. Uploading a second one will override your initial file attachment. If you'd like to upload secondary files (such as recommendation letters or a personally created CV) in addition to your CV - P&T, please contact the Office of Faculty Affairs to assist you.
In Review
To successfully generate a Curriculum Vitae - P&T document for the P&T process:
Log into Portfolio and navigate to your Profile
Confirm your View As section is set to Full View.
Scroll down to see your listed activities.
Use the Include in column to edit which activities are displayed on your document.
If you would like to set date parameters, do so using the date fields. Click the blue refresh button.
Once your Include in and date options are set to your satisfaction, return to the View As field.
Use the drop down to select Curriculum Vitae - P&T.
Click the blue refresh button.
Using the options that have populated next to the View As field, save your CV - P&T to your Documents section.
Log into your Promotion & Tenure account
Select Documents
Click Import CV from Portfolio
Select which CV - P&T you would like to attach from the pop-up list.
Confirm that your document is now listed in the File section of your P&T account.